

The first time I tried to clear the old fence line behind my barn, I burned a whole Saturday with a string trimmer and came away with a half-cleared strip of privet, a shoulder that ached for two days, and a row of sweetgum saplings that had laughed at every pass. If you own acreage that has gone shaggy, you already know the feeling. The ground is there, the fence is under there somewhere, and the brush has decided it owns the place. That is the exact job the CALPALMY Brush Cutter Blade Kit is built for, and in this guide I will show you the step-by-step method I used to clear my own six overgrown acres without renting a skid steer.
I am Dale Kittredge, 61, retired county road-crew foreman, and I have spent the last several winters cutting brush on the 22 acres my wife Carol and I bought outside Crossville, Tennessee. I am not a salesman and I am not a forestry contractor. I am a man who owns one compact utility tractor, one pickup truck, and a lot of patience. The method below is exactly what worked for me on privet, blackberry bramble, sweetgum saplings and old cedar, using the CALPALMY kit on a straight-shaft trimmer.
Start your clearing project with the blade kit that handles saplings, bramble and privet
The CALPALMY Brush Cutter Blade and Adapter Kit gives you three blade sizes and two universal adapter sets in one box, so you can match the blade to whatever the fence line throws at you. Check today's price on Amazon and see the current listing details.
Amazon Check Today's Price on Amazon →Step 1: Walk the Ground and Pick Your Starting Line
Before you fire up anything, walk the whole area you intend to clear. I know it feels like wasted time when the brush is right there, but this walk is what keeps you from cutting yourself into a corner. Look for the fence line if you have one, mark any rocks, stumps, old posts, and wire that might be hidden in the bramble, and decide where the pile will go. I learned the hard way that a brush pile placed too close to the work area just gets in the way and forces you to move everything twice. On the first section I cleared, along the fence line behind the barn, I walked it three times before I felt ready. The bramble hid a fallen cedar, two leaning T-posts, and a strand of barbed wire that ran straight through a blackberry thicket. I flagged each one with orange tape, and that tape saved me from a bad cut later.
This is also the moment to put on your safety gear. I wear eye protection, heavy gloves, long pants, a long-sleeve shirt, and hearing protection. A circular steel blade will throw debris hard, and privet branches whip back when they let go. I also make sure nobody, including Carol and any neighbor who wanders over, is within a good distance of the cutting zone. A blade that catches a hidden rock can send something flying faster than you can react. On that first day, I had Carol stand at the corner of the barn and call out if I drifted toward the flagged wire. It sounds simple, but it kept me honest while I was learning the blade.
Finally, pick a starting line that lets you work in a natural sweep. I like to start at one end of a section and work across, keeping the cleared ground behind me. That way I always know where I have been, and I never have to back myself into a thicket with a running blade.
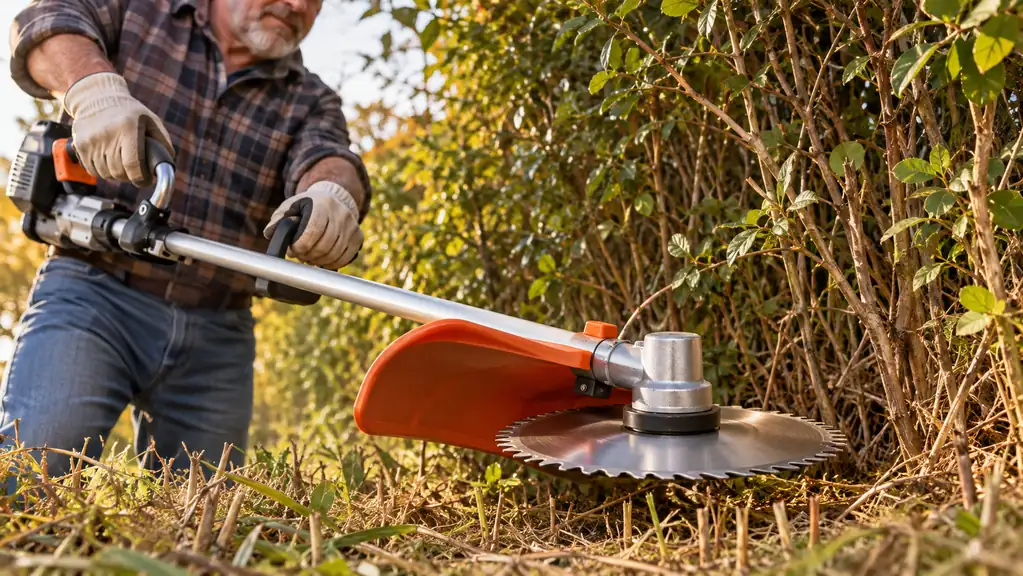
Step 2: Choose the Right Blade from the Kit and Mount It
The CALPALMY kit includes three circular brush cutter blades: a 9 inch x 20 tooth, a 9 inch x 36 tooth, and a 10 inch x 80 tooth, all in alloy steel. That range is the whole point of buying a kit instead of a single blade. For thick privet and blackberry bramble, I reach for one of the 9 inch blades. For sweetgum saplings up to a couple of inches thick, I switch to the 10 inch x 80 tooth blade, which gives me more cutting edge and a cleaner bite on wood. I laid the three blades out on the tailgate before I mounted the first one. The 20 tooth blade has wide gaps that throw bramble clear, the 80 tooth blade has a tighter bite for solid stems, and the 36 tooth sits in between as my all rounder.
The kit also includes two sets of universal adapter hardware with thrust washers, which is what makes it fit a straight shaft trimmer with a 1 inch arbor. I have mounted it on my own straight-shaft trimmer, and the adapter setup is straightforward. The important part is to seat the blade flat, torque the hardware properly, and give the blade a spin by hand before you start the engine. If it wobbles, fix it now, not after you have cut a groove into a fence post. The first time I mounted the 10 inch blade, I did not seat the thrust washer quite right, and I caught it only because I spun the blade by hand and felt a slight tick. I pulled it apart, reset the washer, and it ran smooth. That hand spin takes ten seconds and has saved me more than once.
One note from my own experience: the kit is designed for trimmers, weed eaters, chainsaws and brush cutters, with the exception of the ECHO SRM series. If your trimmer is an ECHO SRM, do not force the fit. Check the manual and the current Amazon listing before you buy. For my straight-shaft unit, the universal adapters lined up the way they should, and the blade ran true.
Step 3: Cut Low and Sweep in a Controlled Arc
The biggest mistake I see newcomers make is trying to chop at brush like they are swinging an axe. A brush cutter blade works best when you let the trimmer do the work. Hold the head low, keep the blade roughly parallel to the ground, and sweep it in a controlled arc from side to side, letting the teeth pull through the stems. You are not chopping; you are mowing the brush down at its base. The first time I tried a blade like this, I made that mistake for ten minutes before I slowed down. When I let the blade find its own pace, the teeth did the cutting and my arms did almost nothing.
For bramble and privet, I keep the throttle steady and move forward slowly. The blade will grab the thin stuff and shred it, and the thick stuff will pop free with a little extra pressure. For saplings, I approach at an angle and let the 10 inch blade take the cut in stages rather than trying to take the whole stem in one pass. Cutting low matters because a sapling cut at ground level does not regrow as fast as one left with a six inch stub. One Saturday in late March, I worked a 40 foot stretch of blackberry bramble that had taken over a corner of the pasture. The canes were as thick as my thumb in places, and the 9 inch blade chewed through them without wrapping once.
Pay attention to what the blade is telling you. If the trimmer bogs down, ease off and let the blade spin back up. If you hit something that sounds like metal, stop and check before you continue. Old fence wire hides in bramble better than anything I know, and a blade that hits it will let you know immediately.
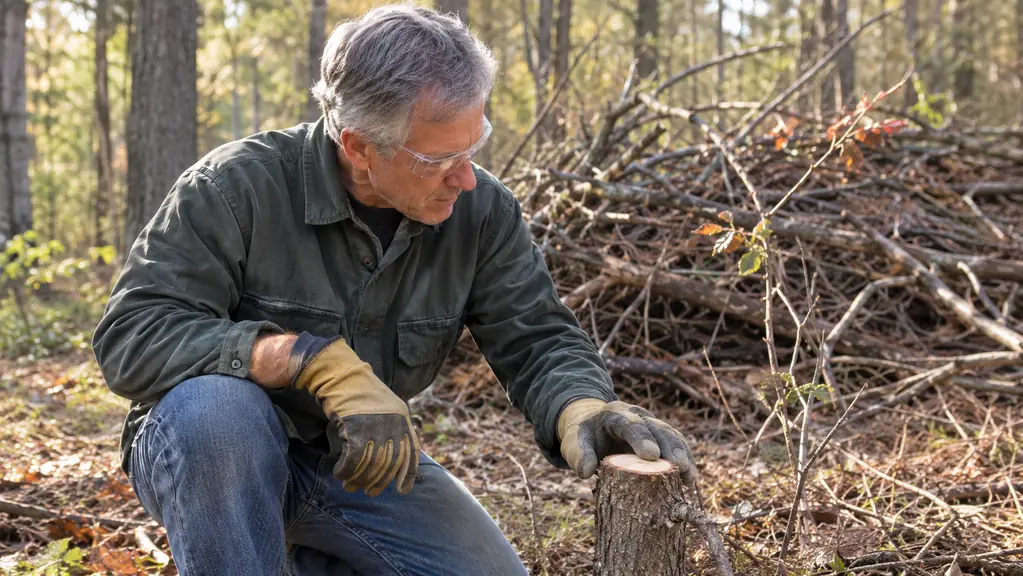
Step 4: Clear the Cut Material as You Go
Do not try to clear the whole section and then deal with the mess. Cut a swath, then rake and drag the cut material onto your pile while it is still in reach. Fresh privet and blackberry canes are heavy and awkward, and they get worse once they tangle with everything else. Keeping the work area clear also means you can see the ground, which means you can see the rocks, stumps and old wire before the blade finds them. I learned this on the first section I cleared. I cut for three hours before I stopped to pick anything up, and the next morning I spent hauling out a tangled mess by hand. Now I stop every twenty minutes and clear the swath before I move on.
I pile the brush along the edge of the cleared section, well away from where I am still cutting. When the pile gets big, I either burn it on a calm day when conditions allow, or I haul it to a designated brush pile with the tractor. On my place, I have one permanent brush pile at the back of the property, and it has grown into a decent wildlife shelter over the years. The pile along the fence line last spring was about eight feet long and four feet high when I finished. I let it dry for a week, then burned it in two sessions on a damp, windless morning. The cedar and bigger sweetgum go to the permanent pile at the back of the property.
This is also the step where I stop and check the blade. A few minutes of cutting in gritty soil will dull the edge, and a blade that is struggling will tear stems instead of cutting them. If the blade is not slicing cleanly, I swap it for the other 9 inch blade in the kit and keep going, then touch up the dull one later. Having three blades in the kit means I am never dead in the water over one dull edge.
Step 5: Finish the Section and Clean Up the Cutters
When the section is down to stubble, I do a final pass at a slightly higher angle to level off the rough spots and catch the stems I missed. Then I walk the whole section one more time, looking for saplings that bent rather than broke and for any wire or debris the blade may have uncovered. It is easier to fix a missed stem while you are still standing there than to come back with the trimmer next weekend.
Cleanup matters more than most people think. I remove the blade from the trimmer, wipe the alloy steel down, and check the adapter hardware and thrust washers for wear. A blade stored wet will rust, and a rusted edge cuts poorly the next time out. I keep the three blades wrapped in an old towel so they are not banging around in the back of the pickup.
I also take a few minutes to clean the trimmer head and shaft before I put it away. Sawdust and sap build up fast, and a clean unit starts easier and runs smoother the next time. Fifteen minutes of cleanup now saves an hour of fighting a gummed-up trimmer later.
What Else Helps
The CALPALMY kit will clear a surprising amount of ground on its own, but a few extras make the job faster and safer. A good pair of loppers handles the saplings that are too thick for the blade and too thin to justify firing up the chainsaw. A heavy steel rake drags cut bramble into the pile without stabbing you every few seconds. And if you are clearing along a fence, a set of wire cutters and a magnet on a stick will save you from the worst of the hidden wire. On the bigger sections, I still use my compact utility tractor to drag out the heavy stuff, but for the bulk of what most landowners face, the trimmer with the CALPALMY blade does the real work.
I cleared a 60 foot stretch of privet and sweetgum in one afternoon with the 10 inch blade, and the only thing that stopped me was running out of daylight.
Three blades, two adapter sets, one weekend of clearing ahead of you
The CALPALMY Brush Cutter Blade and Adapter Kit is the kind of tool that pays for itself the first time you do not have to rent a machine. Check today's price on Amazon and see the current listing details.
Amazon Check Today's Price on Amazon →